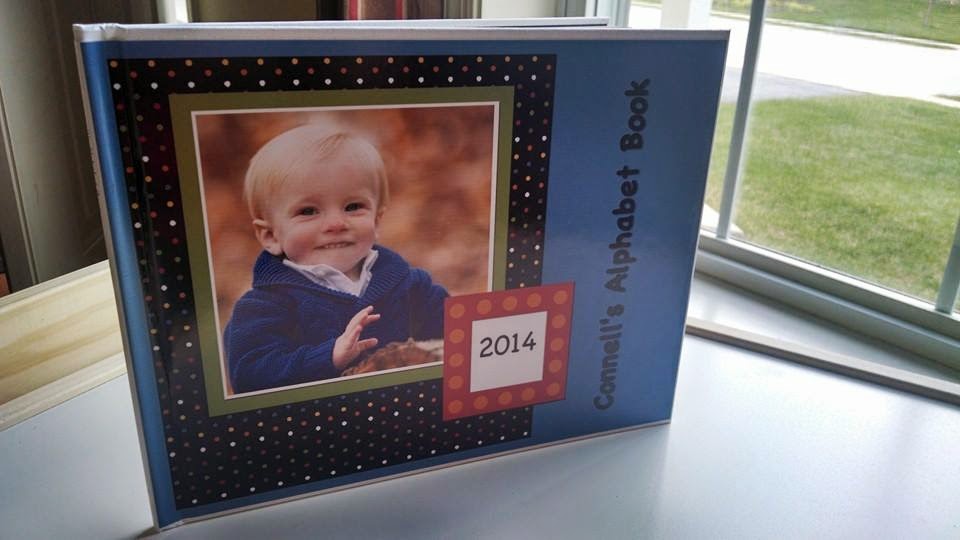
Using the Memory Mixer program and a great coupon from Walgreens, I was able to make Connell a hard bound, personalized alphabet book for $18. It wasn't nearly as hard as it sounds, but it does take a little time. I found that by working on it slowly made it a very relaxing way to have a little "me" time.
Step One.
Organize your photos. I created a new folder and went through all the photos I've taken since Connell was born. Luckily, I was able to find the difficult letters. (V - volleyball, U - Ukelele, X - X-ray, Z - Father Zenon, one of our favorite priests.) Had I not had those, I would have had to add a step and fill in the blanks. I ended up slightly less organized than I would have liked, but this is how my folder looks:

I found some great additions while looking through my husband's Facebook photos. I didn't save them as intentionally as I had planned, but you get the idea. Rename the pictures with the letter you plan to use them for.
Step Two
Step Two
Find a photo program you like. Shutterfly, Walgreen's, and other online photo sites have albums you can create online. I didn't care of those because they didn't allow for must flexibility. I purchased the Memory Mixer program. (Please note, Memory Mixer has an affiliate program. I am not part of that and I am not advertising for compensation.) It took me about an hour of fiddling and futzing to learn the basics. They offer great tutorials on Facebook and YouTube. It's fairly straight forward and I can definitely see myself using this program for many projects in the future. I accidentally deleted the first book I made, so I ended up recreating it. (Completely user error. Memory Mixer is great at saving things logically.) I like my second attempt much more.
The first two screen shots are from the first book I created. The templates in Memory Mixer come pre-made, but are entirely customizable.


Step Three
Build your book. I try as hard as possible to be thrifty, so when Walgreen's sent out a 50% off coupon for their photo books, I jumped. I was able to export each Memory Mixer page as a .jpg. You can do this by selecting the "Share on Facebook" option. Each page will be saved to your hard drive. Then you can upload them to Walgreen's.com.

The tricky part at this point is making each photo page span the entire page rather than fit into their pre-sized template. To do that, drag the photo into the template and then select it. A menu will pop up and will have the option to span the left, right, or entire layout. Choose accordingly.
The tricky part at this point is making each photo page span the entire page rather than fit into their pre-sized template. To do that, drag the photo into the template and then select it. A menu will pop up and will have the option to span the left, right, or entire layout. Choose accordingly.

I chose to use one of the "same day delivery" books. I sent it to them, feeling very nervous, at 1:30. By 2:15, I had email confirmation that it was finished. I am thrilled with the results and very impressed with how well Memory Mixer and Walgreen's worked together so seamlessly.


Connell and I read the book several times a day. He recognizes the people and places in it and I'd like to think he's beginning to recognize the letters, too. My next project is going to be a counting book, but that is going to take some very intentional photography!
No comments:
Post a Comment